Instead of basically rewriting Betty’s post on Yosemite, I’ll point out a few tips and tricks on how I get the most out of your SLR or even regular P&S camera. Furthermore, I’ll go through a few examples of how I got certain effects or framing of shots. Hopefully this will be informative or even inspirational for some of you to get out there and shoot more!
Framing/Use of Foreground Objects and Lights
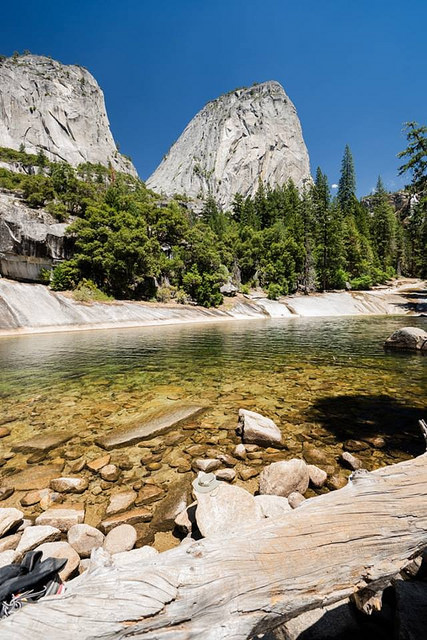
Framing is basically how you tell the story of your photo. You can read up on the rule of thirds and practice that on your own, it’s a pretty good basis to get you started. I like to use leading lines and aspect ratios to tell the story of my landscape photos. In this one below, I used the fallen tree to guide the eyes into the “Emerald Pool” and then lead it up to the tree line and rock formation in the background.
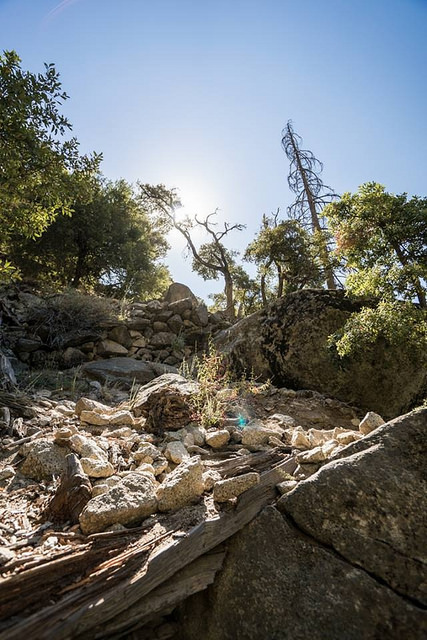
In this shot, I used the rule of thirds for the foreground rocks, the middle with the centered plant and the top with the sky and the centered sun. I like this shot because it showed the terrain that we were hiking up towards Upper Yosemite Falls.
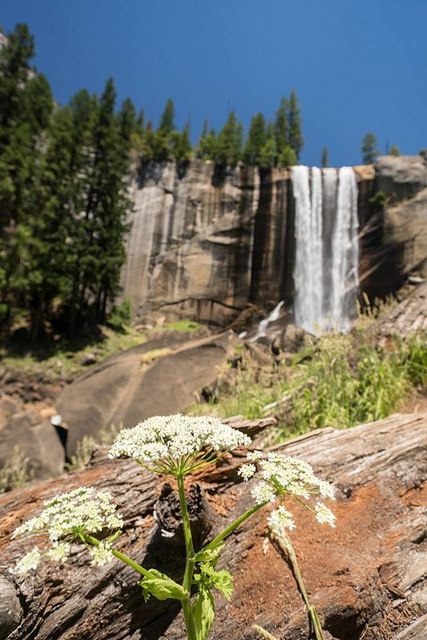
Personally, the shot below is my favorite type of shot: flora in the foreground and stunning nature in the background. The flower in this shot provides a nice initial grab to the eye and then the waterfall in the background puts an exclamation point on the photo.
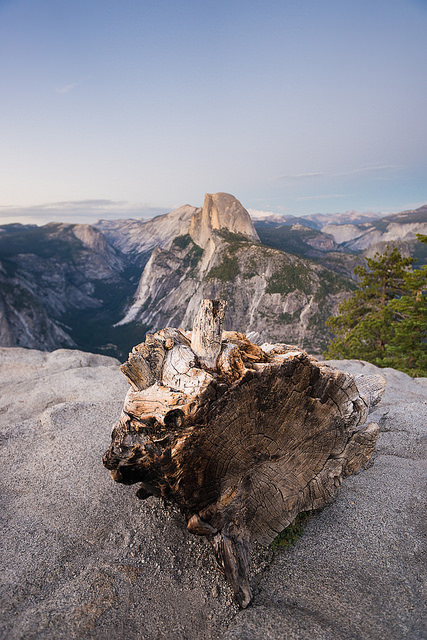
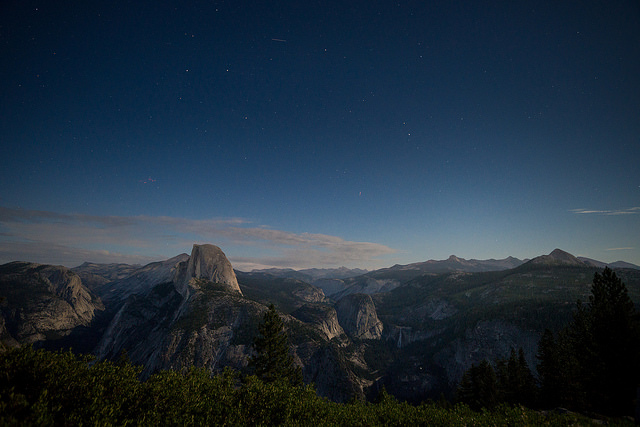
The shot of Half Dome below came out of being tired of shooting what was across the valley. We found this trunk of a tree that was cut and antiquated. Though the tree was a little close in this shot, it’s a nice different perspective from Glacier Point with Half Dome in the background.
Slow Shutter Speed
Generally, this is something that requires a tripod and some neutral density filters during the day. I use a circular polarizer (think polarized sunglasses) to cut through the glare on the water with my lens. It also is tinted, so it makes the bring sunlight a little more subdued. Often times, slowing down your shutter speed slower than 1/30 will cause blurry photos. One of my little tricks is to find a good rock, branch, post, fence, you name it to at least use as a mono-pod for your camera. Below are two shots from the same exact place with a different perspective.
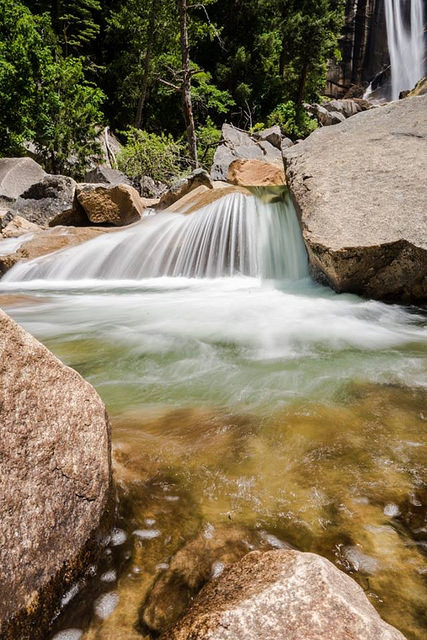

Hand-held slow shutter speed (1/3 sec). While the picture is slightly blurry, I preferred the effect of the waterfall.

Night Shots/Long Exposures
For night shots, you definitely need a sturdy tripod and remote for your camera. Often times with low to no light, your camera will have a difficult time focusing on the object you’re trying to shoot. If you’re stationary and focusing on the object before it’s fully dark, put your lens into manual focus. Third, your settings are key to getting clear stars and not stars that are moving. The longer the exposure, the longer you’ll capture the Earth’s movement… thus stars that will start to move around the axis. The key to not having to slow a shutter speed and still make good use of the low light is balancing your f-stop and shutter speed with a high enough ISO. My go to is usually ISO 800 @ f/2.8-4.0 for 4-6sec to start. Then tweak from there. Good luck!

Reblogged this on 文化的な生活 and commented:
I will go there this wkend so this article is highly appreciated!